Polymer Clay Fan

Free Sculpting Tutorials

Search Results

Angel & Demons Cigar Ashtray Tutorial

Posted by goregt On January - 31 - 2012

My goal for this tutorial is to show step-by-step how the GoreArtistry cigar ashtrays are created from concept to the final product. The tutorial will be covering the following topics.

  1. Basic picture tutorial for the sculpting of the ashtray
  2. Creating the mold
  3. Pouring a cold-cast bronze
  4. Sanding and polishing the cold-cast bronze
  5. Final product

The first step in any project is coming up with a design. Great sculpting on top of a poor design will in most cases result in a mediocre product.  However, I’ve seen projects that have great designs with average sculpting skills create something that really is interesting to look at.  My goal is to hopefully strive for the best of both worlds with a product that results from above average sculpting skills and a great design (we shall see if I’m able to pull it off). Read the rest of this entry »

Sculpting Tentacles Tutorial

Posted by goregt On August - 24 - 2009

I’ll have to admit that I have a thing for the sea lately and a lot of my more recent artwork uses the sea as a common theme. So far I’ve sculpted a female warrior on a giant seahorse and I’m currently working on another personal project that is half woman and half octopus (kinda cool 😉 ). I have quite a few other ideas floating around in my head but as always time seems to be against me. Read the rest of this entry »

Welcome – Polymer Clay Fan

Posted by goregt On August - 7 - 2009
Polymer clay example

Polymer clay example

Polymer clay is a unique sculpting medium that offers a versatility unmatched by any other product in its class. Although other sculpting mediums, such as waxes, may allow more ease for sharper details no other medium can duplicate polymer clays ability to easily create a completed work of art. Details are not foreign with polymer clay either, with enough time and practice anyone can create highly detailed artwork using nothing but polymer clay.This site is a collection of information, tips and sculpting tutorials for my favorite sculpting mediums…Polymer Clay.

My name is Gerald Gore and I am a self taught sculptor. The tutorials on this site are a step-by-step pictures of some of the sculptures I have created. You can read more about me and how I got started sculpting on the About page.

Read the rest of this entry »

Polymer Clay Art

Posted by goregt On August - 5 - 2009

Polymer clay is a very versatile and wonderful medium to work with. Whether your polymer clay art interest is jewelry, wildlife art, dolls, figurines or other polymer clay projects, there are no limitations to the quality of work that you can do. Listed below are examples of a few sculptures created in Polymer Clay.

Polymer clay art of a warrior angel

Polymer clay angel

Polymer clay wildlife sculpture

Polymerclay Indian sculpture Read the rest of this entry »

Using Alcohol on Polymer Clay

Posted by goregt On May - 31 - 2007

Using Alcohol With Polymer Clay

Rubbing Alcohol is a great tool that is used to help smooth and blend polymer clay when sculpting.  Like the Vaseline tutorial, I have several other tutorials where I give examples on how I use alcohol while sculpting (I’ve included a few examples at the bottom of this page).  When I first started sculpting I used water based clay (I had never even heard of polymer clay at that time).  With the water based clay I was able to achieve a smoothing and blending effect by using a wet sponge or Q-tip.  However, when I started using polymer clays, water did not have the same effect.  At first I tried to use water and Q-tip on my polymer clay but the results were pretty poor.  After doing a lot of research on the internet I discovered that rubbing alcohol dissolves polymer clays.  Thanks to other polymer clay artist I was able to learn that alcohol on a Q-tip, sponge or paint brush has the same effect as water on water based clay. I have experimented with different potencies of rubbing alcohol and found that not all are created equal.

Read the rest of this entry »

Polymer Clay Vase

Posted by goregt On May - 26 - 2007

Creating a Marbled Vase

This is a quick and easy tutorial that will demonstrate how to take a plain Jane glass vase and turn it into a work of art with the help of a little polymer clay. This is the first time I have ever done something like this myself so at the end of the page I will cover some lessons learned.

This really is a simple tutorial and I’m convince just about anyone can easily create a marbled vase. If it seems a little challenging at first then just keep practicing and it will come to you in no time at all.

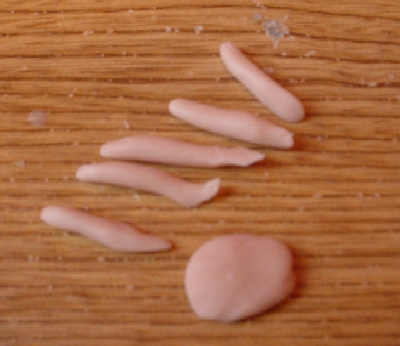
The polymer clay I am using for this particular piece is Premo.

Glass vase filled with Premo polymer clay 
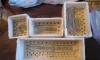
No need to cringe, you do not need that much clay for this tutorial. I was shopping at my local Hobby Lobby and went a little overboard on the clay. All is good since I will have plenty of clay for future projects. To give you an idea on how much clay you will need, I ended using less than one block of two or three colors by the time the vase was completed (My glass vase is around five (5) inches tall).Note: Make sure the glass vase that you purchase can be baked in an oven.
Polymer Clay Premo The first step is to condition the clay. Premo is a little firmer then the clay I normally use, Super Sculpey, so a pasta machine comes in handy here. I’m only using two colors on my vase so I keep rolling out the clay until it is fully conditioned.
Marbled clay The next step is the mix the two colors together and roll them both through the pasta machine. I repeated this step several times until I got a design I was happy with. Just roll the clay, fold, squish it together and roll it again. You don’t want to fully blend the clay, the key here is to keep the marbled look.
Applying polymer clay to the vase 
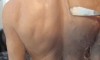
Simply press the clay onto the glass vase. I started from the bottom and worked my way up on this piece.
Polymer clay vase tutorial Still applying clay to the vase.
Smoothing out the clay 
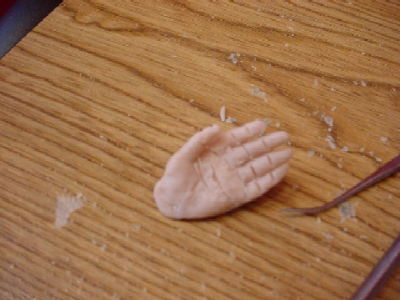
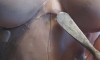
Using one of my dental tools I blend the individual pieces together. Spend some time on this stage since you want the clay to look as if it was on piece. Try to avoid parting lines if possible.
Polymer clay vase art 
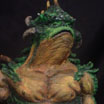
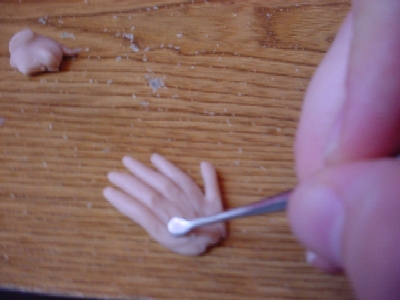
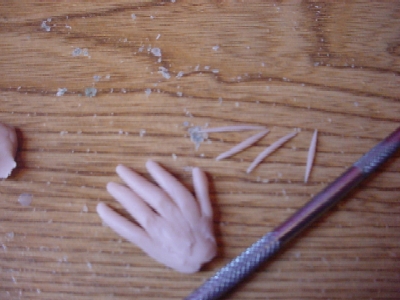
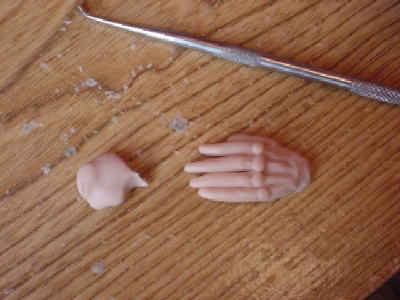
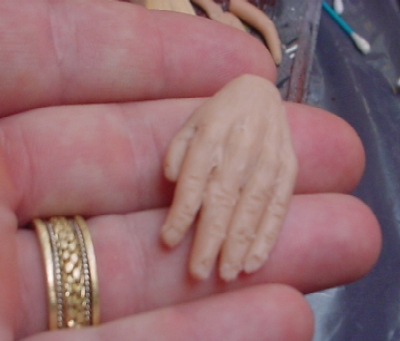
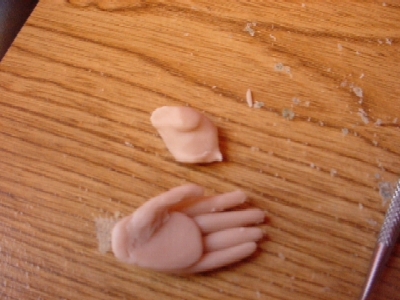
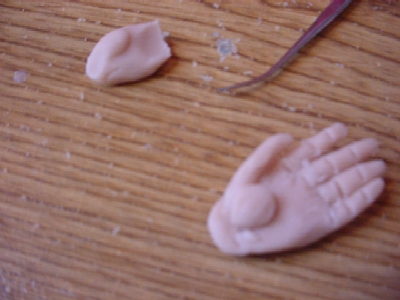
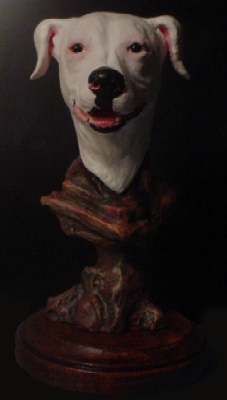
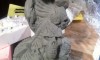
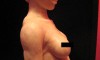
Once you create your own vase you will see how easy this tutorial really is. I personally like to try and take things to the next level when I create my art. A marbled vase is cool but a marbled vase with art hanging off of it is much cooler. I sculpted an Indian on my vase just to give it a little something extra.Tip: To cure the piece bake it in the oven at 275 degrees for 30 minutes (per 1/4 of an inch).
Profile of polymer clay vase A side view of my vase.Probably 98% of the colors on this vase are made up of clay. I added a little paint to tint the skin but other than that no paint was applied to this piece.

Lessons Learned

As I stated at the beginning of this tutorial, this was the first time I have tried something like this. The vase was a good learning experience for me and I did learn a few good lessons along the way. Here are a few tips I plan to use in the future:

1. Wear surgical gloves when sculpting a vase – No issues with the skin here, I just ended up with tons of fingerprints in my piece. Latex gloves would have been a quick and easy solution to avoid any fingerprints. Alcohol can remove the fingerprints but that is a lot of extra work.

2. Don’t rush the project – in all honesty this is not my favorite piece that I have created. I have a lot of other projects I should have been working on but just had to give this idea a try. I only gave myself a few hours for this piece and now looking at it I wish I would have set aside a little more time. All is not lost since I really did learn a lot by creating this vase.

3. Keep your area clean – key warning here, little clay particles lying around will somehow end up in your lighter clays. Also be sure to clean off the pasta machine before mixing different colors of clay.

That’s it! I’ll be sure to do more vases in the future and will probably show more of the sculpting stages in the process. The goal for this tutorial was to show you how you can mix glass and polymer clay to create a piece of art.

Until next time,

– Gerald

Seascape Tutorial

Posted by goregt On March - 18 - 2007

How to sculpt a unique rocky seascape base

In the following tutorial I am going to show you how you can quickly and easily sculpt a cool looking rocky base for your sculptures. The entire process for the base took me around 30 minutes to an hour to complete. As of this writing I just finished a sculpture of a sea dragon. I wanted to add a unique base to my dragon sculpture but I didn’t want anything that I felt was taking away from the sculpture.

** The pictures below will show you step-by-step how I created a base that I think compliments the sculpture. Note that the pictures are thumbnails so click on the individual images for a larger view.

Read the rest of this entry »

Hand Tutorial

Posted by goregt On March - 18 - 2007

How To Sculpt Hand With Polymer Clay

Two of the hardest things that I have found to sculpt are the hands and eyes. I don’t know why, they are just shapes like anything else, but for some reason they always present themselves as a challenge for me. I have a little technique that I am about to share with you that I use for most of the hands I sculpt. However, keep in mind that this is not the only method you can use to sculpt hands.

The technique that I use does not require an armature which has its advantages and disadvantages. I’ve have used and armature in the past but the problem I found is when I decided later on in the sculpting to move the fingers. The fingers can still be moved when using an armature but the detail work can sometimes get damaged in the process. The disadvantage of sculpting hands without an armature is that you do not get the additional support that an armature provides. If the hand you are sculpting is just hanging by the side it really is not an issue, however if your character is holding something like a sword it can then be a problem.

Now the hand in this tutorial is going to be more of a sketch to give you the general idea on how to sculpt a hand. This tutorial should give you a good foundation to start building your hands off of.

Hand sculpting tutorial


*I need to upgrade my digital camera and apologize in advance for the quality of the pictures

1. Roll out a ball of clay and slightly flatten it to the size that you want your palm.2. Roll out five little tubes of clay to represent the fingers
3. Strategically place the fingers onto the top of the squished ball of clay (look at your own hand as a reference)4. Using your sculpting tool, one of my dental tools in this example, pull the fingers into the base of the hand
5. Roll out four more little tubes (snakes) to add as the bones in the hands
6. Roll out little balls of clay for the knuckles
7. Add little horizontal indentions or lines for the knuckles (using another one of my dental tools here)8. Sculpt the finger tips
9. Turn over the hand and blend the fingers into the palms of the hand (try to avoid squishing the fingers)
10. Add a little more clay to the palm to thicken it up a bit.
sculpting a hand with clay 11. Add lines to the fingers to match the location on knuckles (on the other side of the hand). I have cut my lines a little deeper then needed since I will bend my fingers.

Sculpting Tutorials

Posted by goregt On March - 15 - 2007
Sculpting Tips and Tutorials
free polymer clay tutorials Sculpting Series
Â
polymer clay sculpting tips and tricks Sculpting Tips and Tricks

Polymer Clay Sculpting Tutorials

Wax Sculpting Tutorials

General Sculpting Tutorials (not specific to one medium)

Mold Making Tutorials

  • Making a Mold – Step One (New) – Introduction into the mold making process.
  • Mold Box

  • – Step Two (
    New)
    – How to make a mold box for a two piece mold.

Sculpting Scales

Posted by goregt On September - 17 - 2012

There are a lot of different ways you can sculpt scales and the tutorial below is just one of many examples that you can use. I’m using a wax in this tutorial but the same steps can be used with polymer clay.

  1. The first step is to design and sculpt the forms of your sculpture (i.e. muscles bulging, wrinkles in skin, etc)
  2. Next, using a sharp tool I will draw patterns into my wax.
  3. Periodically I’ll brush away the excess wax to clean my surface while I work.
  4. Once I have my pattern to my liking I’ll go back and carve a deeper cutout around my shapes.
  5. After the excess wax has been removed I’ll begin to smooth out and clean up the sculpture with Odorless Mineral Spirits (use rubbing alcohol if you are sculpting with polymer clay). Read the rest of this entry »

VIDEO

Enter the video embed code here. Remember to change the size to 320 x 270 in the embed code.

TAG CLOUD

Recommended Sites

About Me

Nothing special, just a self-taught sculptor having fun with my art and showing all of you the tips and tricks I use to create my own artwork

Twitter

    Photos

    Activate the Flickrss plugin to see the image thumbnails!